64 F mostly sunny, beautiful day!
This bridge was on my to paint list: it's a long list......
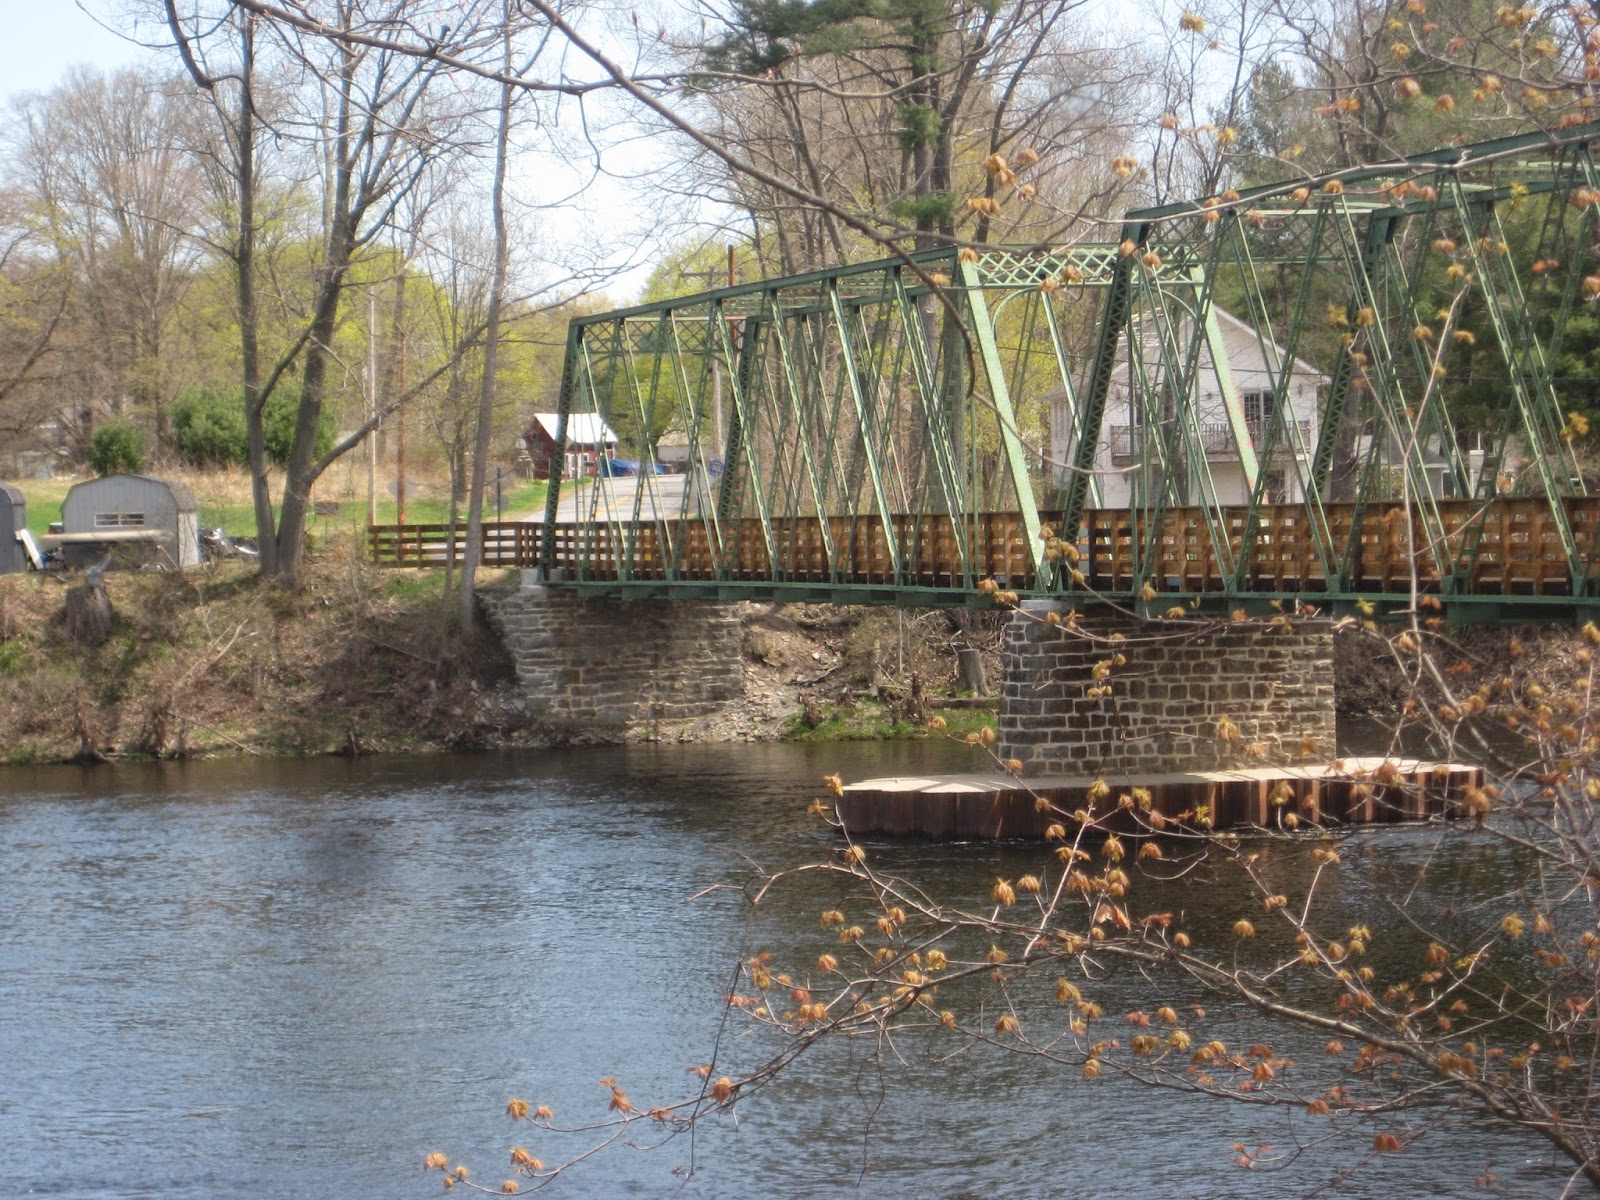
#293 Hudson River A Hudson Crossing Park.
14 x 16
$600
When I started there was a bit of haze and not much shadow, this park is beautiful, but you've got to hike around and I was eating up my time, so I said this was it, and......
Here's the pallet, notice two piles of white, I go through that and more, but the reds I barely whisper at them.
I re-did the measuring photos.
View point is everything, today I was able to stand about 3 feet back, enough to comfortably see the canvas. I'll often have to "re-find" my viewpoint by checking my measurements. Note how my left edge is to the right of the pylon, and the end of the brush in the above pic is at the edge of the house, these are my points and I want to remember them so I can find viewpoint when I loose it (all the time!)
It's one thing to get the frame, it's another to find the elements within, this is how I do that. One thing to note is that once I get the basics figured out I don't have to think too much about it, and that's a good thing, because there are plenty of other things to think about.
At this stage it's still not figured out, until most every hole is filled you can't get an idea of what's going on.
Getting there, but I'm balking at getting what's behind the bridge, I build up areas like that, behind things like trees and trestle bridges, because how else?
.......
Ready for the bridge....
Like I said: ready for the bridge!
The drawing of the bridge gave me a bit of a time, but I showed it who's boss and where it should be!
This is where I ended up! I don't know how I got here exactly, but I arrived to my destination intact, so my saying, all's well that ends well, and I can't say that all the time.
My scene at the start, the shadows are not sharp as they will be later in the session.
Here the light co-operated long enough to get some contrasts.
My set up, all one carry.
My pallet at the end.


Amazing. So beautiful Matt. Thanks.
ReplyDeleteYou've got a new fan. I like the way you present in photo and dialog.
ReplyDeleteThank you Iwan! and thanks to you Anon, glad you enjoy the blog!
ReplyDeletedunno about the painting, but I love the pallete
ReplyDeleteframe the pallete chuck the painting?
Chrissy, thanks for the comment, I'll sell you the pallet, but it'll get scrapped off soon.....
ReplyDeleteMatt, thank you so much for going into all this detail. I'm going to post it to our Facebook page again. You are the best! I know it's not easy to stop and record your process. It's much appreciated.
ReplyDeleteElizabeth
Hi Elizabeth, I just realized we've already connected! and thanks so much for all your support! I'm more than pleased that you, and your network, are looking and reading my blog, it's all good!
ReplyDeleteVery interesting. Have you posted this as a tutorial on Youtube? I think it would be very helpful to a lot of people. Apart from the educational value the outcome is beautiful!
ReplyDeleteThanks Susannah, I have not done anything on u-tube, but it's a great idea, and I'd love to, in addition to the technical issues, like what kind of camera and how to set up and post, I mutter a lot of profanity under my breath while I paint, I'm not sure if the world is ready for that or if it would effect my work.
DeleteHey Matt! I love your blog and also wish you had included photographs and instruction on color mixing. Starting out as a watercolors I got used to white of paper. Unfortunately I have never found a way to properly use white nor more importantly how to keep white pile clean as I always want to keep dabbling into it. Should I just premix what colors I think I will need before painting? BTW-Awesome painting! Lawrence
ReplyDeleteHey Lawrence! thanks for your comment and question. It's been decades since I tried watercolor, so I can't help you there. I usually start on a medium tone so the white (or lights) can play off it right at the start. I always pre-mix black out of ultramarine and burnt sienna, but I think it It's high time I try something else(maybe) I'll often mix a small pile of what ever the sky is going to be, or the darker part of it, that gets tempered down depending on the sky conditions, I'll keep some of this light blue (for lack of a better name) around to mix in with other colors when I want it. I can't keep my white clean either, and don't care! clean colors are over rated in my humble opinion, I'll temper most of the white down with something, so if I need a spot of white t the end of the process I'll have it. Paint on!
DeleteWell done! I like the end result, but I also like the stage in between which would be a very nice abstract painting with some green and water, and I like the pallet at the end. Thanks for showing the process.
ReplyDeleteThanks so much Chani! The "picture" in some ways is just an excuse to create an abstract arrangement of forms and color, if it doesn't work as an abstraction it can't work as anything, I show the pallet because it's hard to explain in words what's going on....almost every color has traces of every other color (almost) and the pallet shows how inter-related all the colors are. It also shows amounts, lots of some color and just little smidgens of others, isn't the way life is?
ReplyDeleteYes, it is indeed!
Deletegreat work I love the way you handled the water
ReplyDeleteThank you Katalin!
ReplyDelete